
Mastering the art of ball joint replacement largely depends on having the right tool in hand. In this discussion, the spotlight is on the imperative of having the ideal tool for removing ball joints, its functional scope, the benefits associated with it, and a step-by-step manual for its practical utilization. Key tools, such as the hammer, pickle fork, claw-type press, ball joint separator, ball joint press, and grease, feature as some of the most effective in the process.
Tool For Removing Ball Joints: The Why and How of Replacement
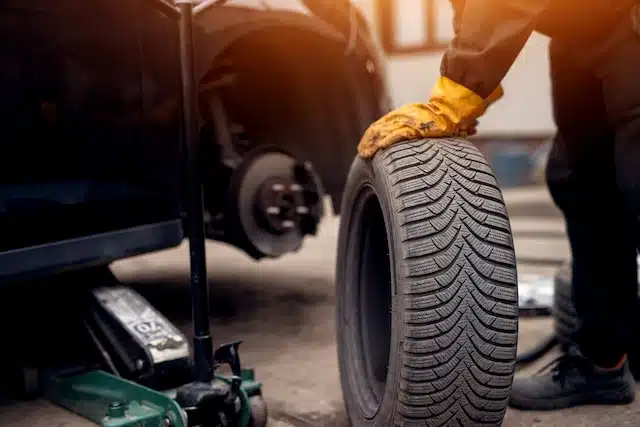
Ball joints, critical elements of a vehicle’s suspension system, function as the pivoting link between the steering knuckles and control arms. They endure the brunt of the vehicle’s weight and facilitate a wide range of wheel motion. However, with wear and tear, these components start to fail, manifesting in loose steering, uneven tire wear, and overall compromised driving experience. Such scenarios necessitate a replacement, accentuating the need for the right removal tool.
The Ball Joint Press: An Essential Tool for Every Garage
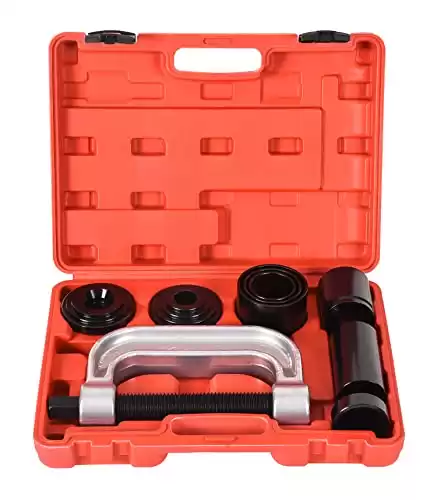
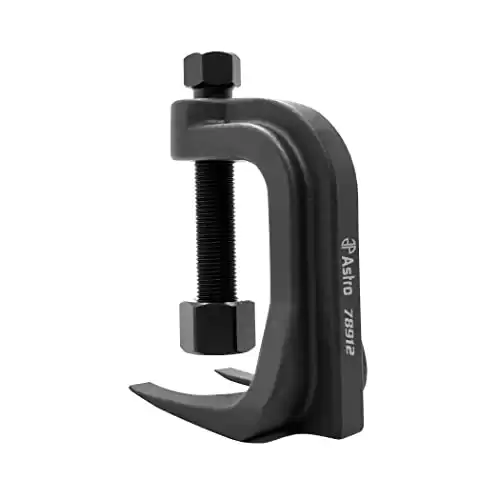
The tool favored by most for ball joint removal is the ball joint press, alternatively known as a ball joint separator. This tool is designed to displace the ball joints by applying pressure from various angles, releasing it from the control arm’s grasp. A typical ball joint press kit includes a diverse selection of cups and adapters to fit a variety of ball joint dimensions and types.
The virtues of a high-grade ball joint press are multiple. It ensures a safe and effective ball joint removal, reducing potential damage to the surrounding suspension components. Moreover, it can translate into substantial savings by eliminating the need for professional intervention. A well-crafted ball joint press is built for resilience and versatility, promising excellent returns on investment.
Removing Ball Joints: Other Tools
“Right tool for the right job” is a key principle in automotive mechanics to avoid making tasks more difficult, causing safety hazards, or damaging components. This is particularly important for the suspension’s ball joints, where multiple tools can be used to detach them from the spindle. Here are four common types of ball joint tools.
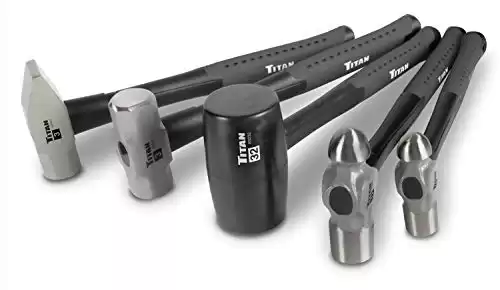
Hammer
For newer vehicles with steel or cast iron spindles, a hammer is an effective tool to dislodge ball joints. Rather than hitting the stud directly, the aim is to tap the side of the spindle, jolting the joint loose.
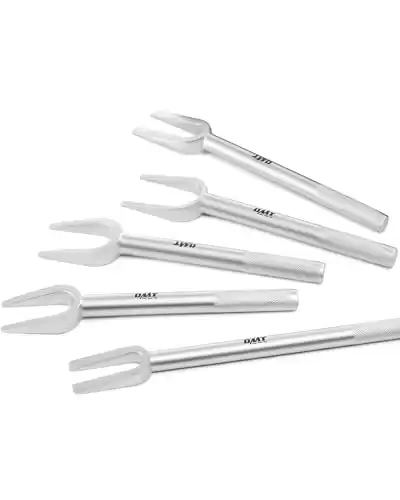
Pickle Fork
The pickle fork, known for its part-damaging tendency, is a widely recognized tool for separating ball joints. It’s not advised for reusable parts due to its knack for ripping dust boots.
Simple Claw-Type Press
Typically used for tie-rod joints, this one-piece press can be utilized for ball joints if they’re not overly seized. However, cheap versions might not fit well and risk spreading under excessive pressure.
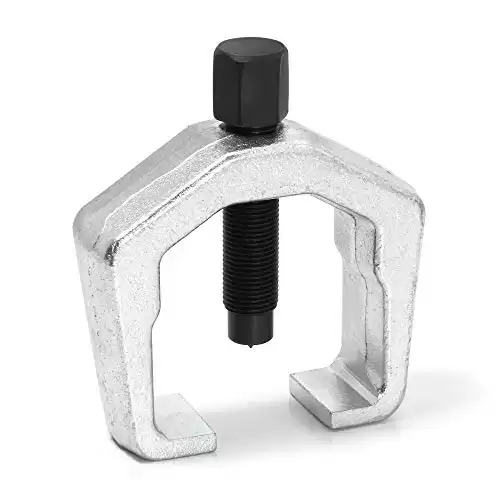
Ball Joint Separator
For confined spaces where a one-piece ball joint press doesn’t fit, a scissor-style separator is ideal. It grips the spindle in an offset manner, allowing it to fit into smaller areas.
Grease
Grease is an essential part of ball joint maintenance and replacement. In most ball joints, grease acts as a lubricant to reduce friction and wear. It’s especially needed when you’re installing a new ball joint. Some ball joints come pre-greased and sealed from the manufacturer, which are often referred to as ‘sealed’ ball joints. Others have a grease fitting, allowing for periodic addition of grease, which is an essential part of ongoing maintenance.
Pros of Lucas Oil Heavy Duty Grease:
- High-Temperature Resilience: It withstands extreme temperatures, staying pliable even in very low temperatures, which is excellent for varied climates.
- Versatility: Suitable for a broad range of applications, including automotive, agricultural, heavy-duty, and industrial.
- Superior Stability: Offers more stability than standard lithium greases, enhancing its durability and effectiveness.
- Water Resistance: Its virtually waterproof composition ensures it remains effective in wet conditions, preventing washout.
- Extreme Pressure Formulation: Contains additives that exceed OEM specifications, offering enhanced protection and performance.
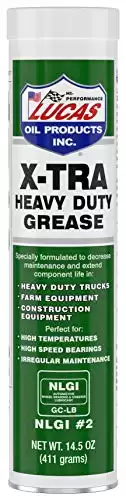
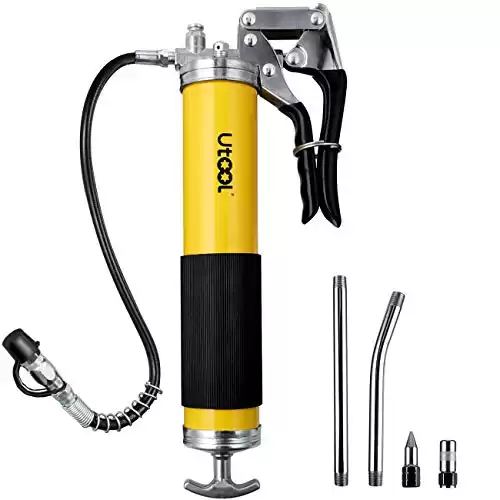
So, while grease isn’t a “tool” in the strictest sense, it’s a critical supply that’s necessary for proper ball joint operation and maintenance. It’s used in conjunction with a grease gun, which would be considered a tool, to apply the grease to the appropriate parts.
Removing the Wheel: Essential Tools and Steps
Before diving into the task of ball joint replacement, the first step is to safely remove the wheel of the vehicle. This process requires a few essential tools:
Car Jack and Jack Stands
When it comes to removing and replacing ball joints, one tool is absolutely critical to the process: the car jack. While the focus often lies on the tool for removing ball joints itself, the humble car jack plays a significant role in the overall operation.
Jacks are used to safely lift and support the vehicle during the process of ball joint replacement. This allows for a comfortable and secure working environment under the car. Furthermore, by lifting the car, it permits the suspension to hang freely. This is crucial for removing the pressure on the ball joint, enabling easier removal and installation.
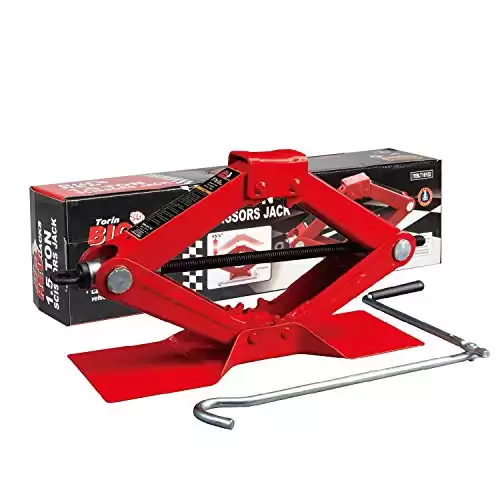
Once the vehicle is elevated, jack stands are used to securely hold the car in place. This ensures a stable and safe working environment throughout the process.

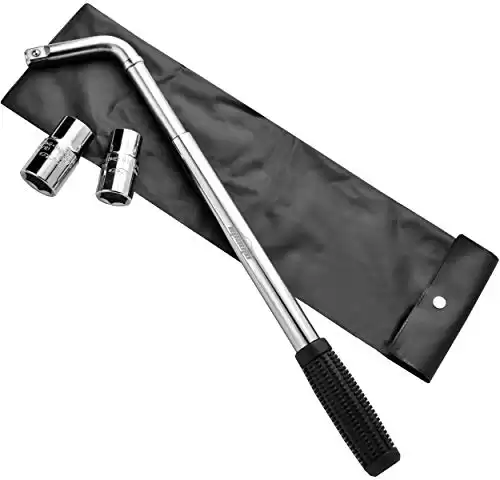
Lug Wrench
After the vehicle is lifted and secured, the next step is to loosen and remove the lug nuts that secure the wheel to the vehicle. A lug wrench, also known as a tire iron or wheel brace, is the tool required for this job.
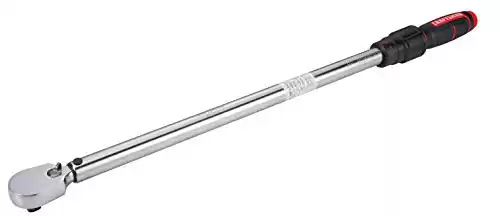
Torque Wrench
While not essential for the removal process, a torque wrench is vital when reinstalling the wheel. This tool ensures that the lug nuts are tightened to the correct specification, preventing them from either coming loose or being over tightened.
Gloves
To protect your hands and improve grip, a good pair of mechanics gloves are often useful.

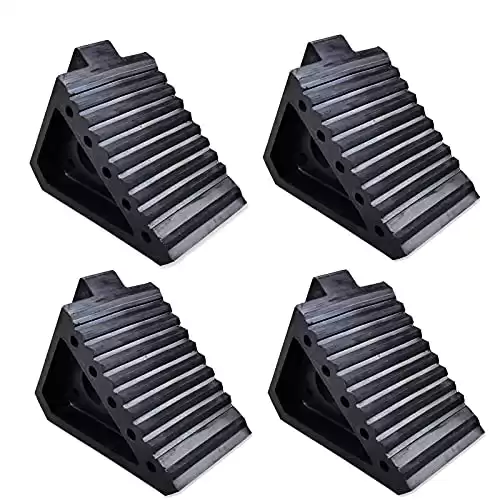
Wheel Chocks
To prevent the vehicle from rolling while it’s lifted off the ground, wheel chocks can be used to secure the other wheels that are still in contact with the ground.
After gathering these tools, the process of removing a wheel is relatively straightforward:
- Place the wheel chocks around the wheels that will remain on the ground.
- Use the car jack to lift the vehicle.
- Secure the vehicle on the jack stands.
- Use the lug wrench to loosen and remove the lug nuts.
- Remove the wheel from the vehicle.
Now, with the wheel safely removed, you’ll have access to the suspension components, including the ball joint.
Practical Approach: How to Use a Ball Joint Press
At first glance, utilizing a ball joint press might seem daunting, but with proper instructions, it turns into a relatively simple task. Here’s a basic guide to navigate you through the process, shedding light on this essential tool for removing ball joints:
- Workspace Setup: Confirm the availability of sufficient space, suitable tools, and safety gear.
- Ball Joint Press Placement: Assemble the press and position it over the ball joint, ensuring the press pushes against the joint and not the control arm.
- Pressure Application: Rotate the press screw in a clockwise direction to apply pressure, which results in the joint’s displacement.
- Ball Joint Removal: Cautiously remove the displaced joint.
- New Ball Joint Installation: Set up and secure the new ball joint in place, then tighten as per the manufacturer’s directions.
- Safety remains paramount at all stages. Ensure to wear safety equipment, work in a well-ventilated area, and consult professionals if unsure.
What prompts the necessity of ball joint replacement?
Ball joints encounter degradation when substances like dirt, grit, and other impurities infiltrate them, or when there is an escape of grease, causing insufficient lubrication. Additionally, factors like rust formation and common wear and tear contribute to their damage. The consequences of such degradation include overplay and a loose feel, exceeding the specifications outlined by the manufacturer. While functional ball joints facilitate seamless side-to-side movement, they shouldn’t exhibit a wobbling or jolting motion vertically. This is a definitive sign signaling the requirement for ball joint replacement.
Tool for Removing Ball Joints: FAQs

Q: What are the best tools for removing ball joints?
A: Some of the most effective tools include the hammer, pickle fork, claw-type press, ball joint separator, and ball joint press.
Q: Can I use a hammer to remove ball joints?
A: Yes, a hammer can be used effectively, especially for newer vehicles with steel or cast iron spindles. However, one must tap the spindle’s side, not the joint stud.
Q: What is a pickle fork used for?
A: A pickle fork is commonly used to separate ball joints. But note that it can damage parts and is not recommended for reusable components.
Q: How do I use a simple claw-type press for removing ball joints?
A: These presses can be used if the joint isn’t overly seized. It’s important to ensure it fits between the spindle and the ball joint head, and that it doesn’t spread under high pressure.
Q: When should I use a ball joint separator?
A: A ball joint separator, or a scissor-style separator, is particularly useful when space is limited. It fits in more places due to its ability to grip the spindle in an offset manner.
Q: What is the advantage of using a ball joint press?
A: The ball joint press allows a clean and safe removal of the ball joint from the control arm, ensuring the joint remains reusable. However, they can be expensive due to the need for specific adapters.
Q: Can these tools be used for all types of vehicles?
A: While these tools are generally applicable to a wide range of vehicles, always refer to the specific manufacturer’s manual for any particular requirements or specifications.
Q: How can I tell if my vehicle’s ball joint is bad?
A: Indicators of a bad ball joint may include unusual noises, instability, and handling concerns. A thorough pre-alignment inspection is recommended.
Q: What should I look for when inspecting a ball joint?
A: Inspect the integrity of the rubber boot. If it splits and grease leaks out, problems may arise. Also, consider the movement of the joint and whether it aligns with the manufacturer’s specifications.
Q: Do I need specific tools for press-in ball joint replacement?
A: Yes, tools needed include a ball joint press kit, various wrenches, ball joint separator, needle nose pliers, screwdrivers, tire iron, axle press, hammer, and rust penetrant, among others.
Q: Are these ball joint removal tools readily available?
A: Yes, these tools are commonly found in automotive supply stores and online. Some are even available for rent due to their high cost.
Q: Is there a risk of damaging my car with these tools?
A: With proper use and careful adherence to instructions, these tools are designed to safely remove ball joints. However, improper use may risk damage.
Q: Do you need a car lift to replace ball joints?
A: No, you don’t necessarily need a car lift to replace ball joints. However, you will need to raise the vehicle off the ground. A hydraulic floor jack and a set of sturdy jack stands will suffice for this job. It’s important to ensure the vehicle is securely supported before you start working.
Q: What are the consequences of a failed ball joint?
A: A failed ball joint can lead to loss of control of the vehicle as it directly affects steering and suspension. It can also cause excessive wear on tires.
Q: Can I replace a ball joint myself?
A: With the right tools and some mechanical knowledge, it is possible to replace a ball joint. However, if you’re unsure, it is recommended to get it replaced by a professional mechanic.
Q: How long does it usually take to replace a ball joint?
A: The time can vary depending on the type of car and the tools used, but typically, it can take around 2 to 3 hours per joint for a skilled mechanic. For less experienced individuals, it might take longer.
Q: How often should I inspect or replace ball joints?
A: Ball joints should be inspected regularly as part of routine car maintenance. Replacement frequency depends on vehicle usage and driving conditions, but generally, they should be checked every 30,000 to 50,000 miles.